

Getting started
BundleHound lists every app on your Mac with its bundle ID, and copies the ID when you double-click the app. This page takes you from installing it to your first copied ID, and shows where the rest of the documentation is.
What BundleHound does#
BundleHound shows every app on your Mac, running or installed, next to its bundle ID.
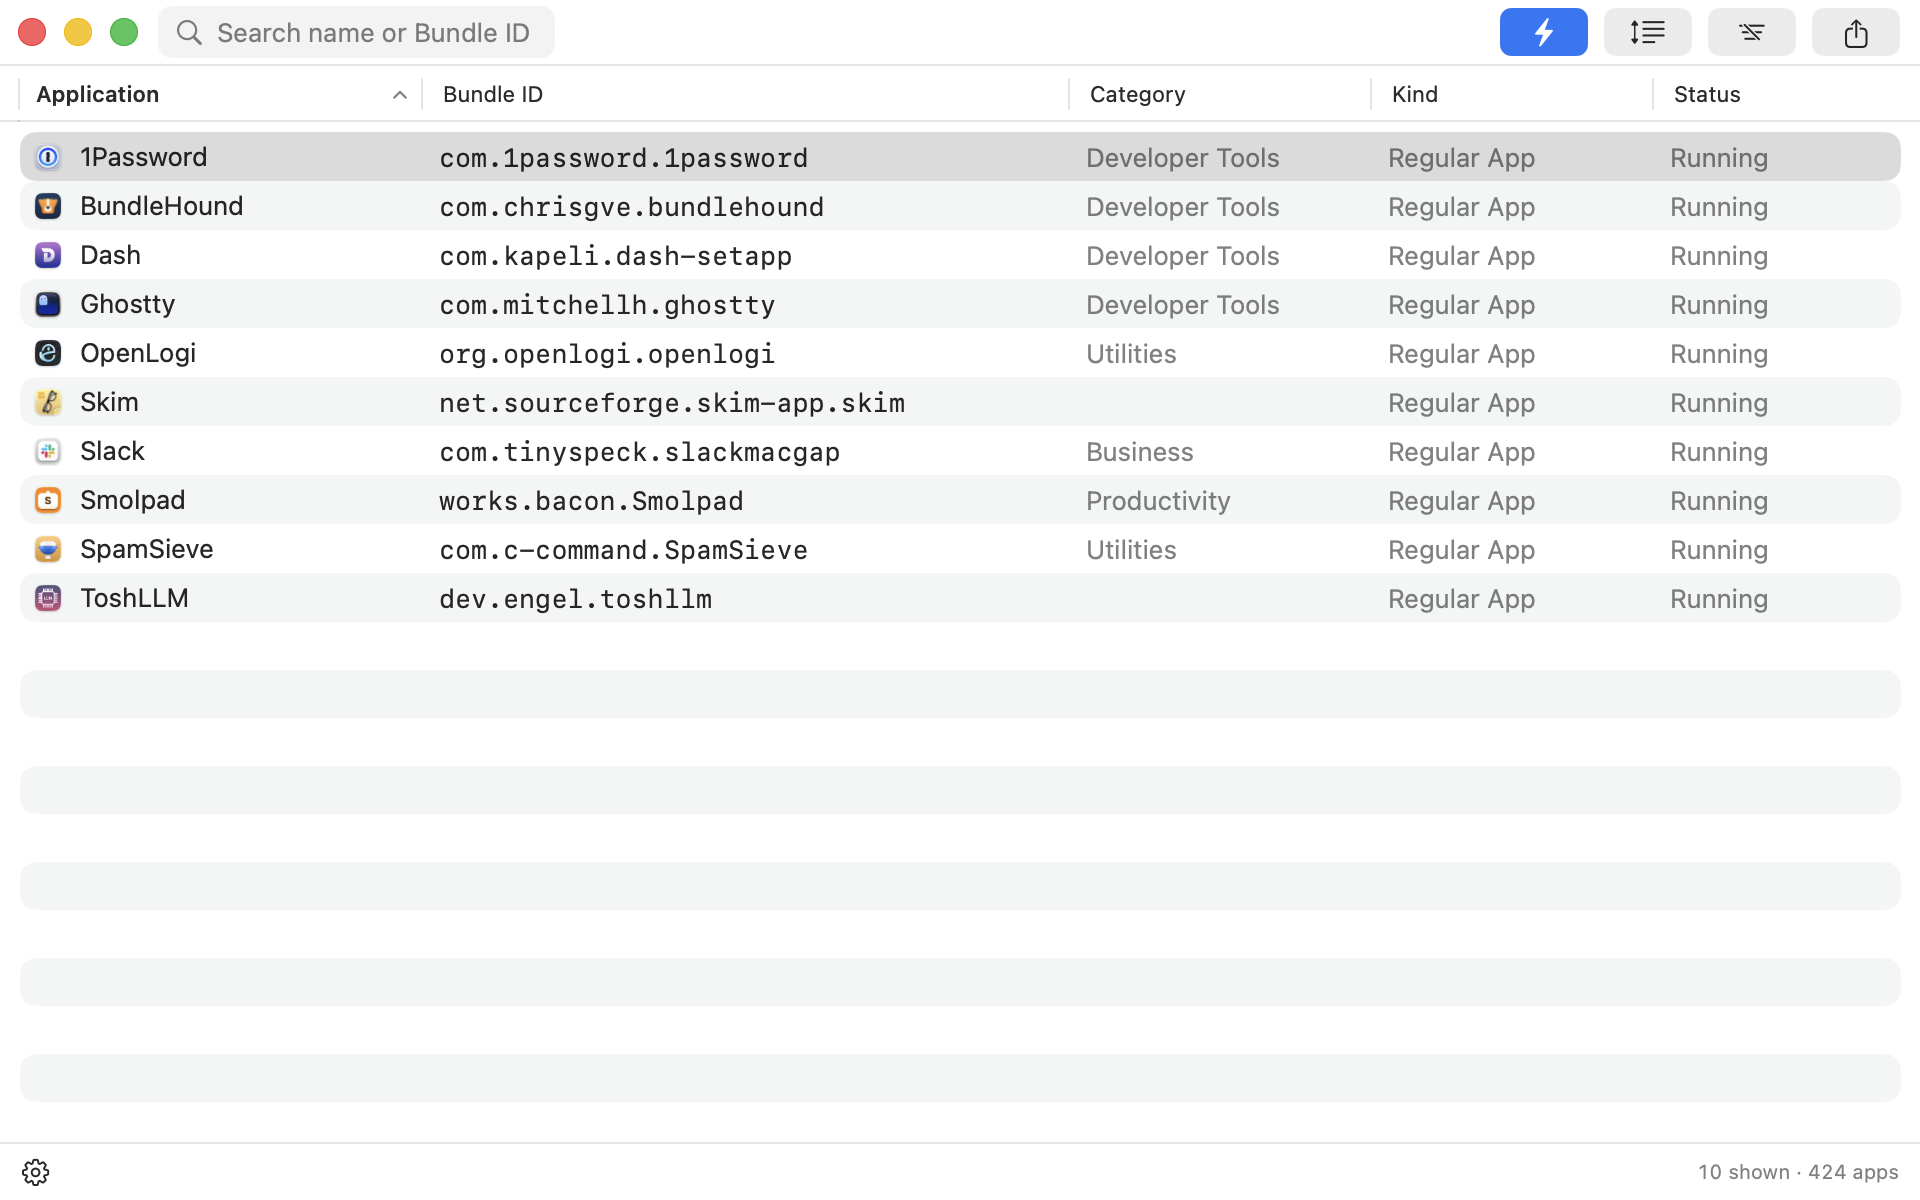
The list window. One row per app, the bundle ID beside the name.
Full size: The list window. One row per app, the bundle ID beside the name.
- 1: Application column (the app's name)
- 2: Bundle ID column
- 3: counts at the bottom
A bundle ID is the name macOS uses to tell one app from another, such as com.apple.Safari. It normally stays the same when an app is renamed or updated. That is why tools ask for it: AeroSpace, Hammerspoon and Keyboard Maestro, defaults commands, and MDM profiles an administrator sends to a Mac.
Each row is one app: its name 1, its bundle ID 2, and further down its category, its kind and whether it is running. BundleHound only reads your apps. It changes none of them.
Good to know
- Running apps always appear. Installed apps are found in
/Applications,/System/Applicationsand/Library. - An app kept in the Applications folder inside your home folder appears only while it runs. The Mac App Store sandbox keeps BundleHound out of your home folder.
- The counts at the bottom 3 read like
20 shown · 405 apps: the rows in the list now, and every app BundleHound knows. The gap is what the current filters hide.
Install and first launch#
Get BundleHound from the Mac App Store, open it, and answer one question.
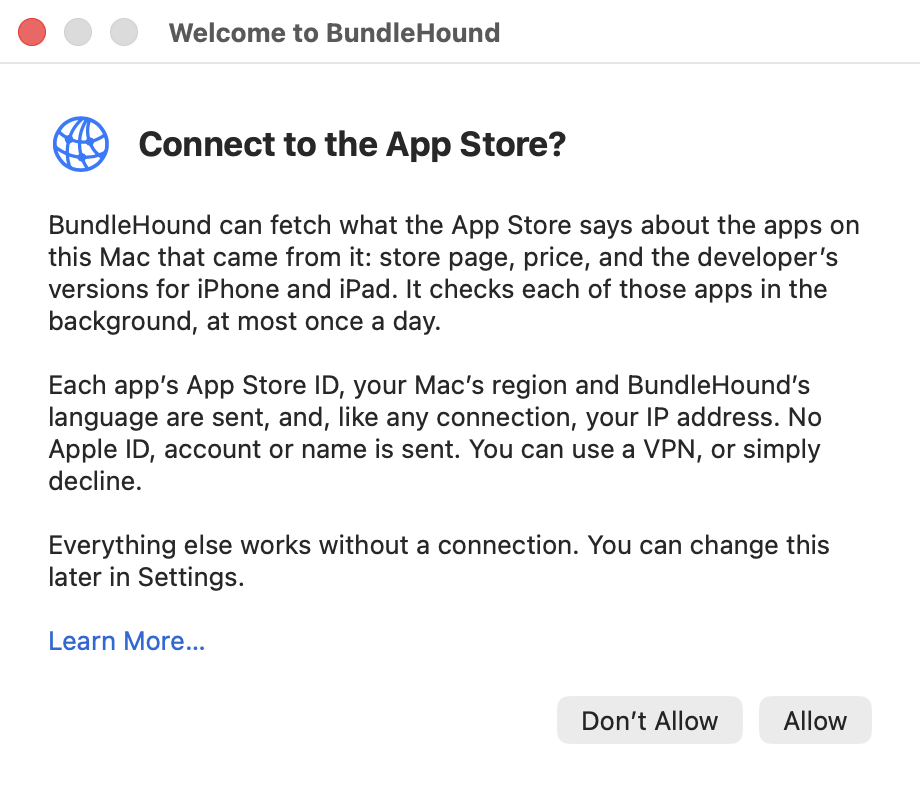
The one question BundleHound asks.
Full size: The one question BundleHound asks.
- 1: Allow
- 2: Don't Allow
- 3: Learn More…
- Install BundleHound from the Mac App Store. It needs macOS 15 Sequoia or later, on an Intel or Apple silicon Mac.
- Open it. The window Welcome to BundleHound asks “Connect to the App Store?”
- Choose Allow 1, or Don’t Allow 2. Allow lets BundleHound look up App Store details for the apps you installed from the App Store. Don’t Allow keeps it offline. Everything else works without a connection. Learn More… 3 opens Internet access in your browser.
- A five-page tour follows. Click Continue to go through it, or Skip.
Note: BundleHound asks for no Accessibility, Automation or Full Disk Access permission.
Good to know
- Neither answer is the default: Return chooses neither, so click one.
- Close the window before answering and internet access stays off. Change it later in
Settings ▸ Privacy. What it sends is in Internet access. - To see the tour again, choose
Help ▸ Welcome to BundleHound, or the same item in the menu-bar icon’s right-click menu. The Help menu exists only while BundleHound shows its Dock icon. Its other items, BundleHound Help, Keyboard Shortcuts, Report a Problem… and Privacy Policy, open pages of this website in your browser. - After the first launch, small tips appear in the list, one at a time. A tip goes away once you have done what it describes.
- With the Dock icon on, the list window opens at launch behind the first-launch window. With the menu-bar icon only, click the icon to show the list.
Where BundleHound lives#
BundleHound has an icon in the menu bar and one in the Dock. Click the menu-bar icon to open the list.
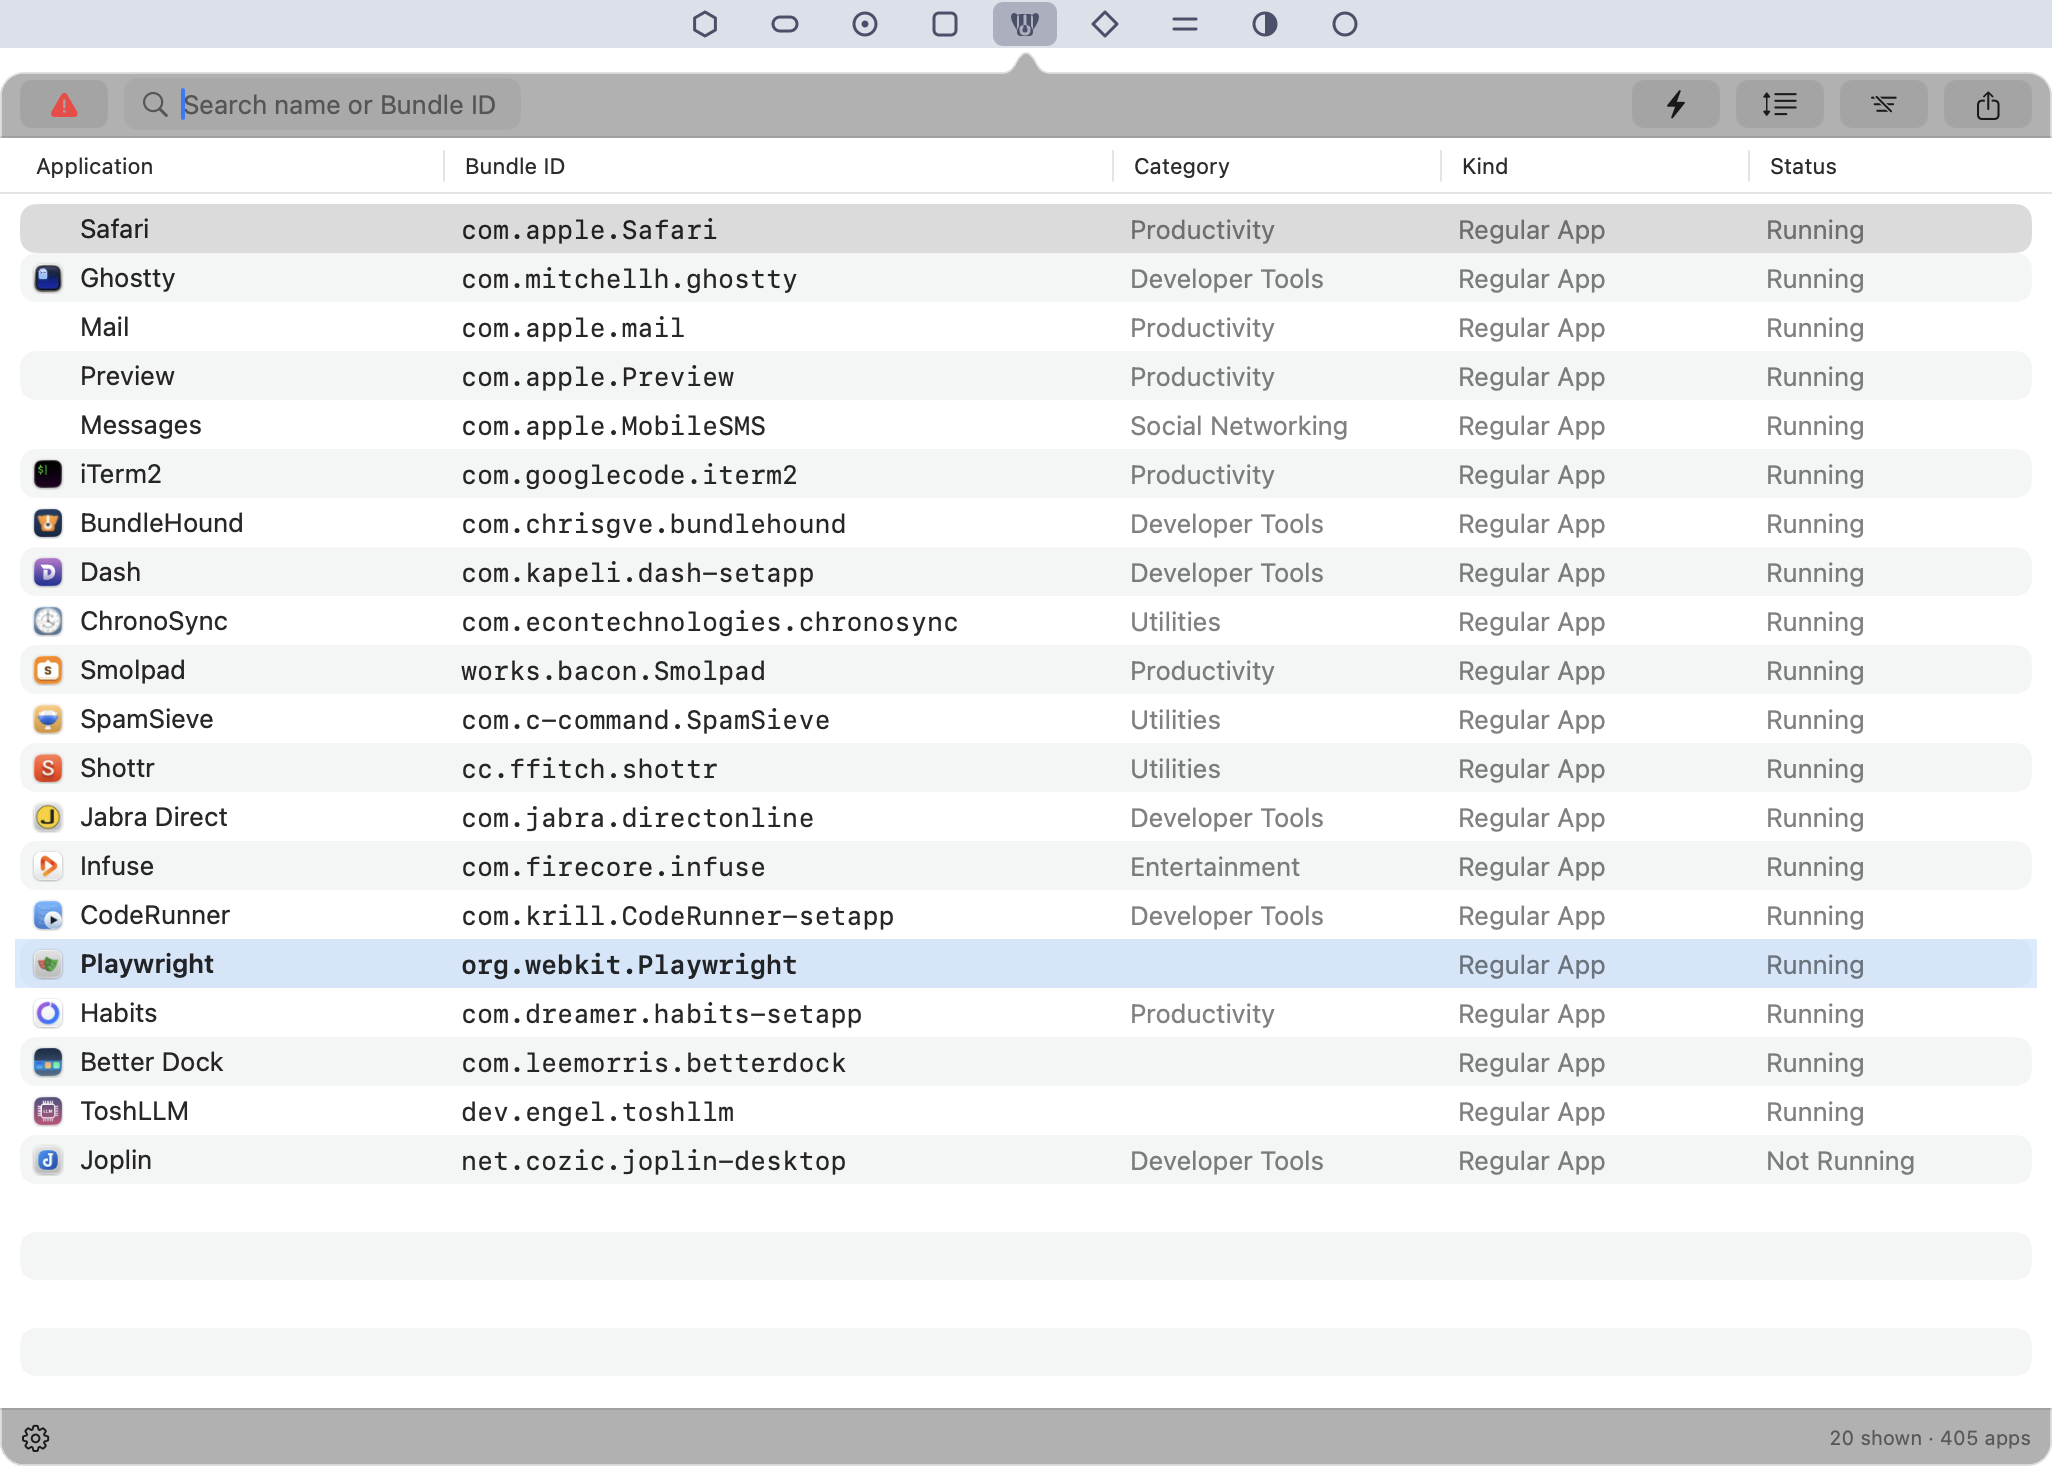
The list attached under the menu-bar icon.
Full size: The list attached under the menu-bar icon.
- 1: BundleHound's menu-bar icon
- 2: the list, attached under the icon
- Click the menu-bar icon 1. The list opens attached under it 2, like a menu. Click the icon again, click elsewhere or press Escape to close it.
- Click the Dock icon instead and the list opens as an ordinary window that floats. Drag the attached list away from the menu bar and it floats where you drop it.
- Closing the window does not quit BundleHound. To quit, right-click the menu-bar icon and choose Quit BundleHound.
- To choose which icons appear, open
Settings ▸ General ▸ Icon placement. Open Settings with the gear at the bottom left of the list.
Good to know
- It is always the same window and the same list, attached or floating. A floating window remembers its place between launches.
- One icon always stays on. Turning off the last one switches the other back on.
- With the Dock icon off there is no app menu. About BundleHound, Welcome to BundleHound, a Help submenu with the Help menu’s web links, Settings… and Quit BundleHound are in the menu-bar icon’s right-click menu.
- ⌘, opens Settings and ⌘Q quits, while BundleHound is the active app.
Settings ▸ Generalalso holds Window always on top and Launch at login.
Copy your first bundle ID#
Type part of the app’s name, press ↓, press ⌘C, then paste.
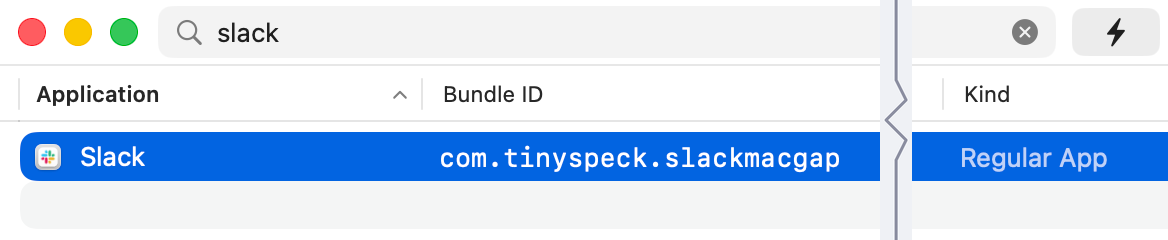
The search narrows the list as you type. Here the text is slack.
Full size: The search narrows the list as you type. Here the text is slack.
- 1: search field
- 2: selected match
- 3: Bundle ID column
- Open the list. The search field 1 has the cursor.
- Type part of the name or the bundle ID, here
slack. The list narrows to the apps whose name or bundle ID contains the text. - Press ↓ until the match you want is selected 2, here Slack. Check that it is the app you want.
- Press ⌘C. The app’s bundle ID 3 is now on your clipboard.
- Paste it with ⌘V into the tool that asked for it. For Slack you get
com.tinyspeck.slackmacgap.
No keyboard? Double-click the app’s row instead of steps 3 and 4.
Good to know
- Typing does not clear the selection. ↓ moves down from the row already selected, and starts at the top when no row shown is selected.
- Running Apps Only is on when BundleHound is new, so an app that is not running does not show. Press that button, the bolt in the toolbar, to include installed apps.
- While All Rows is off, the list holds only your most recently used apps. Press All Rows to see every match.
- To copy several bundle IDs at once, or the ID inside a command or a config line, see Copying and exporting.
Where to go next#
Six more sections, in the order you are likely to need them.
- The list: the columns, search, filters, exclusions, and what to check when an app is missing.
- Copying and exporting: copy one or several bundle IDs, copy them as a line for your tool, or save the list as a file.
- App information: what BundleHound reads about an app, comparing apps, the tamper warning and App Store details.
- Settings: General, Appearance, Filters, Snippets and Privacy.
- Keyboard shortcuts: every shortcut in one place.
- Internet access: what BundleHound goes online for, what it sends, and how to turn it off.