

Copying and exporting
Copying is what BundleHound is for. A bundle ID goes to your clipboard in one step. It can also arrive as a finished line for the tool that asked for it, or leave the app in bulk as a file. This section covers the four ways.
Copy a bundle ID#
Double-click an app, or select it and press ⌘C, and its bundle ID is on your clipboard.
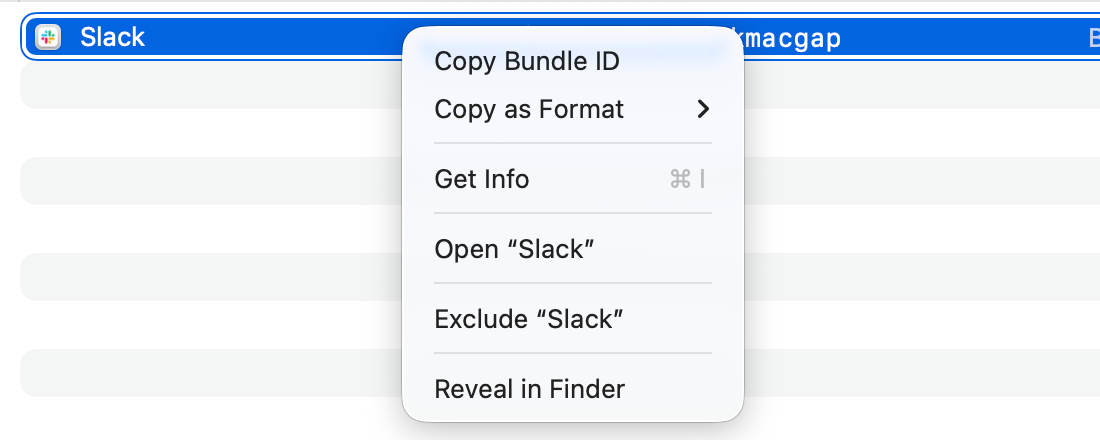
The row menu. Copy Bundle ID is the first item.
Full size: The row menu. Copy Bundle ID is the first item.
- 1: Copy Bundle ID
Do one of these, then paste with ⌘V:
- Double-click the app’s row.
- Select the row and press ⌘C.
- Right-click the row and choose Copy Bundle ID 1.
To copy several: ⌘-click adds single rows and ⇧-click selects a range. Then press ⌘C or use the row menu. You get one bundle ID per line, in list order.
To copy without the mouse: type part of the name, press ↓ until the app you want is selected, press ⌘C.
Good to know
- With nothing selected, ⌘C copies the bundle ID of every row the list shows, one per line. A selected row that a filter or the list length now hides does not count: with only such rows selected you get every row shown.
- When the list opens, the row you last selected is still selected if it is in view. Otherwise the first row is. ⌘C works straight away.
- In the search field, ⌘C copies the selected text if there is any, and the selected rows’ bundle IDs if there is not. The text in the Bundle ID column cannot be selected in part.
- To copy any other value of an app’s information, press ⌘I, hover over the value and click its copy button.
- An app that declares no bundle ID shows a dash (—) in the Bundle ID column.
Copy as Format#
Copy as Format puts the bundle ID inside a line your tool understands, such as an AeroSpace rule or an open -b command. It lists only your own snippets, so it is greyed out until you make one.
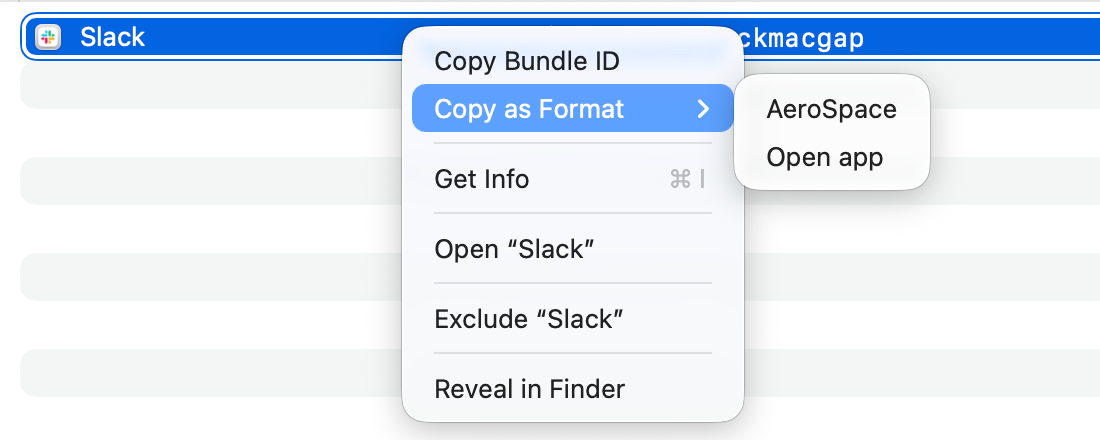
Copy as Format lists the snippets you made.
Full size: Copy as Format lists the snippets you made.
- 1: Copy as Format
- 2: a snippet’s name
- Select one app, or several.
- Right-click and choose
Copy as Format ▸1 and your snippet’s name 2. - Paste with ⌘V.
Good to know
- With several apps selected you get one line per app, each app once.
- A snippet set to take one app at a time is greyed out while more than one app is selected. See Snippets.
Snippets#
A snippet is a line of text with {bundleID} in it. Copy as Format puts the app’s bundle ID in its place.
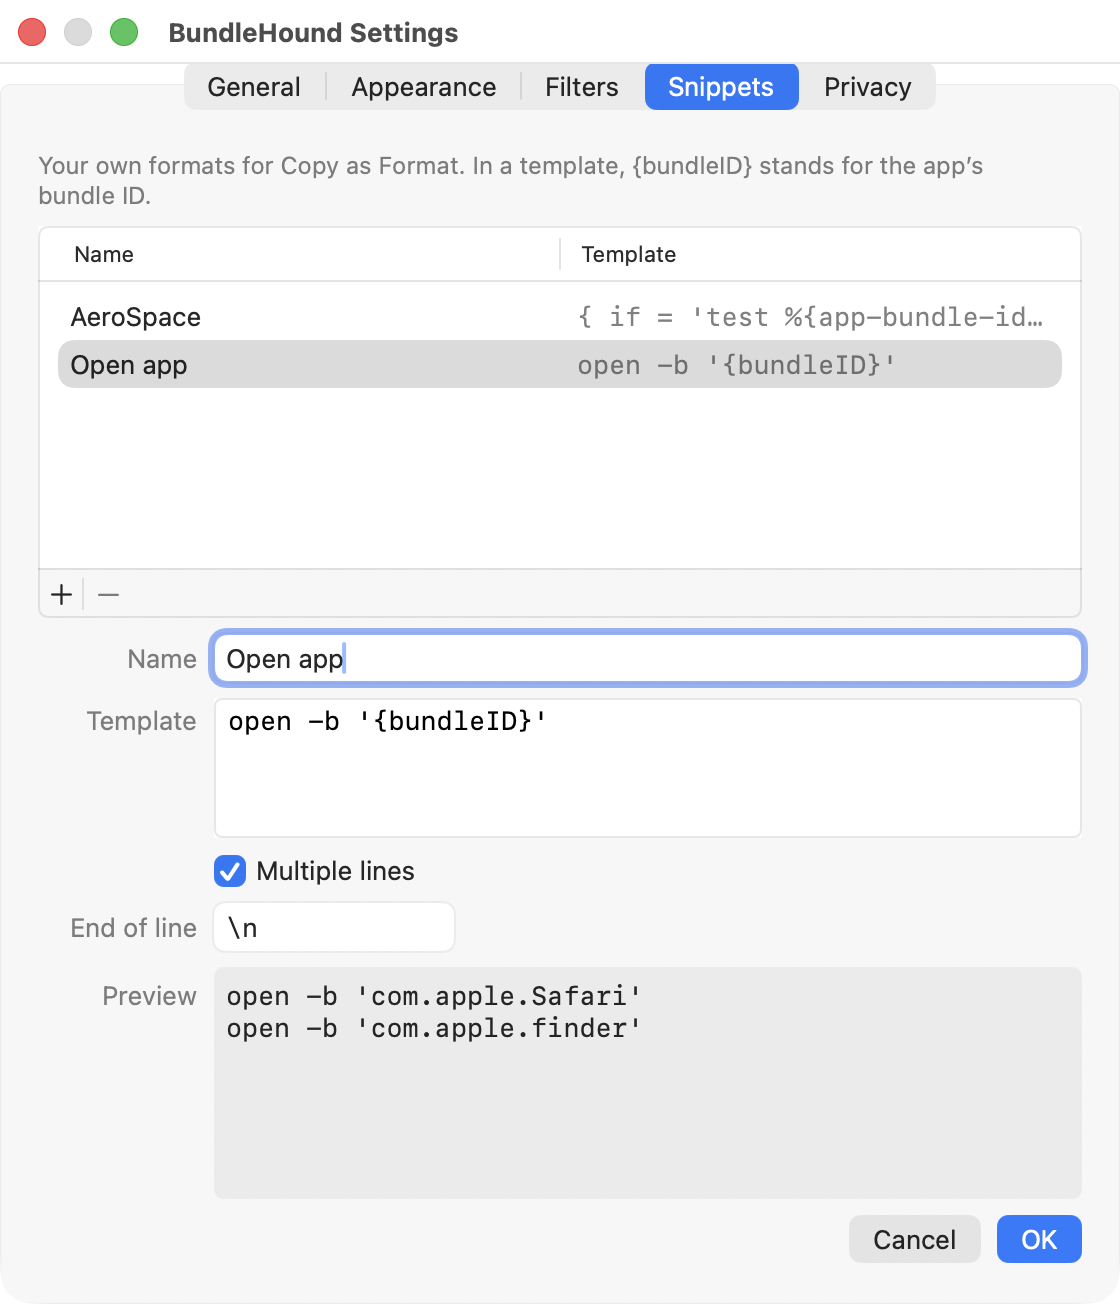
The Snippets pane.
- 1: the + button
- 2: Name
- 3: Template
- 4: Preview
- 5: OK
- Open
Settings ▸ Snippets. - Click + (Add a snippet) 1 under the table.
- Choose Custom Snippet, or one of the templates below it.
- Type the Name 2 the menu will show.
- Edit the Template 3.
{bundleID}stands for the app’s bundle ID. - Check the Preview 4.
- Click OK 5. The snippet is now in Copy as Format. Cancel drops a new snippet, or puts an edited one back as it was.
The + menu lists Custom Snippet, then four Apple commands, then templates for other tools, each group in alphabetical order. A template becomes your own snippet, free to rename and edit.
| In the + menu | Template |
|---|---|
defaults read … |
defaults read '{bundleID}' |
open -b … |
open -b '{bundleID}' |
osascript -e 'tell application id …' |
osascript -e 'tell application id "{bundleID}" to activate' |
Swift: NSWorkspace urlForApplication … |
NSWorkspace.shared.urlForApplication( |
| AeroSpace | { if = 'test %{app-bundle-id} = {bundleID}', run = 'layout floating' }, |
| BetterTouchTool | BTTActiveAppBundleIdentifier == "{bundleID}" |
| Finicky | opener?.bundleId === "{bundleID}" |
| Hammerspoon | hs.application.launchOrFocusByBundleID("{bundleID}") |
| Rectangle | open -g 'rectangle:// |
…and more.
Good to know
- A new custom snippet is named “New Snippet” and its template is
{bundleID}. Until you edit it, it copies the bare bundle ID. - Nothing reaches Copy as Format until you click OK. OK and Cancel are greyed out until you change the snippet. Return presses OK from the one-line fields and Escape presses Cancel.
- The Template box takes several lines: Return there adds a line.
- Leaving a changed snippet asks “Save changes to …?” with Save, Cancel and Don’t Save. That covers choosing another snippet, adding one, switching tab, closing Settings and quitting. Cancel keeps you on the snippet.
- Multiple lines on: the snippet copies several apps at once, one line each. Off: it is greyed out in Copy as Format while more than one app is selected. It is off for a new custom snippet. Every template takes several apps, except BetterTouchTool’s.
- End of line shows while Multiple lines is on. It is what ends each app’s line, and starts as
\n(a new line).\n,\t,\rand\\are read as in a string literal. Finicky’s template joins several apps with||at the end of each line, so the result reads as one condition. - Preview shows what a copy would give, with Safari’s bundle ID, and Finder’s too once Multiple lines is on. You can select and copy its text.
{bundleID}is replaced exactly as it is, with nothing escaped. The templates already carry the quotes their tool expects. In your own snippets, add the quotes your tool needs.- To remove a snippet, select it in the table and click − (Remove the selected snippet). It goes at once and nothing asks.
Export#
Export saves what the list shows, or the rows you select, as a plain text, CSV or JSON file.
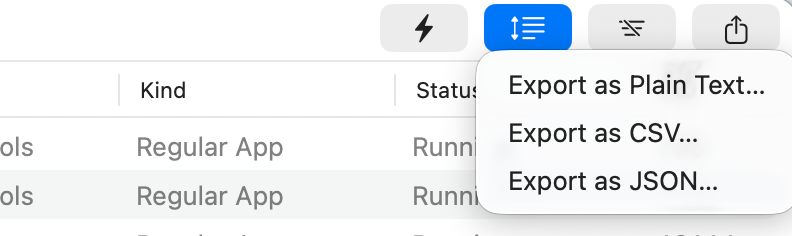
The Export menu.
- 1: Export button
- 2: the three formats
- Set the list to show what you want. Toolbar buttons, filters and search all count. To export only some apps, select two or more rows.
- Click Export 1 at the right end of the toolbar: a square with an arrow pointing up.
- Choose Export as Plain Text…, Export as CSV… or Export as JSON… 2.
- Pick a name and a place, and click Save. The name starts as
Running Applicationswith the format’s extension.
| Format | Contents |
|---|---|
| Plain text | One line per entry: bundle ID, a tab, the app’s name. |
| CSV | A header line, then one line per entry. |
| JSON | One object per entry with the list’s facts, plus an information object with the lines of the app’s information page. |
Note: An export lists every app in it, which can say a lot about your Mac. Before you attach one to a support message, trim it to the relevant rows.
Good to know
- Two or more rows selected: those rows go in the file. One row or none: every row the list shows. One selected row is usually just where you last clicked.
- To export every app, turn off Running Apps Only, press All Rows and Every Kind, and clear the search.
- An app running as several processes gives one entry per process.
- CSV columns are
name,.bundle_identifier, category, status, pid, kind, path categoryis the identifier the app declares, such aspublic., or empty.app-category. developer-tools statusisrunningornotRunning.kindisregular,accessory(a menu-bar app) orbackground, never System. - In JSON,
informationcarries version, signature, team, entitlements, architectures, URL schemes, automation, launch jobs and more. Yes-or-no lines aretrueorfalse, and lists are arrays. - Only what is on your Mac is read. App Store details are included as BundleHound last fetched them, and only while internet access is on. With it off they are left out. Seals are not checked for the export, so there is no
sealline. - If the file cannot be written, macOS shows an alert with the reason.